Laboratory furniture
(Redirected from Occupied Bot Hanger)
Jump to navigation
Jump to search
Laboratory furniture are unique pieces of furniture that are usually found in the Abandoned Lab. Most of them can additionally be either crafted or bought from The Janitor.
Types
| Item | Name | Placed Appearance | Dimensions |
|---|---|---|---|
| Back Doors |   |
4 wide x 4 high | |
| Bot Hangers | 2 wide x 3 high (Empty) 3 wide x 4 high (Occupied) | ||
| Ceiling Monitor | 3 wide x 2 high | ||
| Computer | 2 wide x 2 high | ||
| Intercom | 2 wide x 2 high | ||
| Mossy Tube | 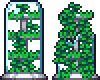 |
3 wide x 5 high | |
| Railings | 1 wide x 2 high | ||
| Reactor |  |
9 wide x 5 high | |
| Reception Desk |  |
4 wide x 3 high | |
| Reception Monitors | 4 wide x 4 high | ||
| Server Cabinet | 2 wide x 4 high | ||
| Signs | 2 wide x 2 high | ||
| Test Tubes | 1 wide x 1 high | ||
| Wall Fan | 2 wide x 2 high | ||
| Wide Console | 3 wide x 2 high |
Crafting
Recipes
| Result | Ingredients | Crafting station |
|---|---|---|
| ||
| ||
| ||
| ||
| ||
| ||
| ||
| ||
| ||
| ||
| ||
| ||
| ||
Notes
- Laboratory Reception Desk and Server Cabinet count as a table for the purposes of housing.
- Test Tubes count as a placed Bottle for the purposes of crafting.
- Laboratory Reactor has a minimum pick requirement of 300%.